How to Blur Background in Lightroom?
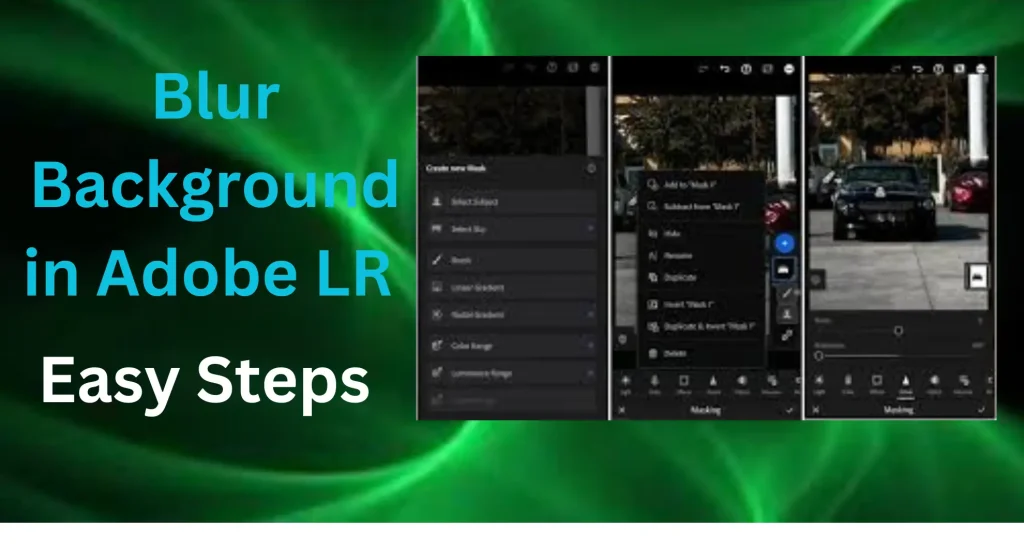
Blur Background in lightroom Many users seek assistance with changing the background of their images to enhance their overall quality. Often, after capturing an image using the portrait mode of their camera, they want to blur the background to remove distractions. Adobe Lightroom is a powerful tool that can help achieve this effect, known as the bokeh effect.
In this guide, we will walk you through a simple method to create a blurred background using Adobe Lightroom.

Steps to Create a Blur Background in Lightroom
1: Upload Your Image
Uploading an image to Adobe Lightroom is the initial step in blurring the background of any image. Begin by navigating to the Library module. Click the Import button to upload your image from your computer or cloud storage. This step allows you to bring your image into Lightroom where you can then proceed with background blurring and other adjustments.

2: Adjustment Brush or Radial Filter Tool
Adobe Lightroom offers several powerful tools to blur or change the background of your images with precision. The Selective Adjustment tools allow you to target specific areas for refined edits. If errors occur during adjustments, the Erase Tool ensures seamless correction. The Radial Filter, a popular choice, lets you create circular or oval adjustments, resizing and applying effects to modify chosen areas. Both tools are housed in the Develop Module, giving you complete control over background blurring and detailed image enhancements.

3: Brush Size and Feathering
In Lightroom, mastering the Adjustment Brush Tool is crucial for creating a refined and seamless background blur effect. The tool offers comprehensive customization, allowing you to adjust the brush size for pinpoint accuracy when targeting specific areas of your image. The size slider enables precise control, ensuring that only the desired parts of the background are affected. Equally important is the feathering adjustment, which softens the edges of the brush application, facilitating smooth transitions between the blurred and sharp areas. By fine-tuning both size and feathering, you can achieve a subtle, natural-looking blur that enhances the overall aesthetic of your image. This level of control ensures a professional-quality finish, with seamless blending that elevates your editing precision.
4: Reduce Sharpness and clarity
Reducing sharpness and clarity in Adobe Lightroom is a powerful technique for achieving a soft, blurred effect that enhances the mood and texture of your images. By accessing the Adjustment Brush panel, you can easily adjust the Sharpness and Clarity sliders to the left, effectively diminishing harsh details and introducing a smooth, delicate blur. This method not only softens the image but also lends it an ethereal, dreamlike quality, perfect for creating artistic compositions or reducing the intensity of overly sharp elements. The ability to control these settings offers a refined way to soften your image, making it ideal for portraiture, landscape photography, or any situation where a polished, subtle touch is required to enhance the visual aesthetic. This approach allows for both creativity and precision, elevating the overall look of your image.
5: Brush over the Background
Blurring the background effectively in Lightroom requires skillful use of the Adjustment Brush Tool. Begin by brushing over the background areas you want to blur, ensuring precision by adjusting the brush size. The bracket keys provide a quick and efficient way to do this: pressing the left bracket key ([) reduces the brush size, while the right bracket key (]) increases it. This method offers fine-tuned control over your brushwork, allowing for detailed and exact application of the blur effect. By carefully managing the brush size, you ensure that the transition between blurred and focused areas remains smooth and natural. This technique is vital for achieving a polished, professional-quality background blur in Lightroom, giving your images a clean, aesthetic finish with precision and subtlety. Whether used for portraits, landscapes, or creative compositions, this approach helps to isolate subjects and create striking visual impact.
6: Refine Your Mask
After blurring the background in Lightroom, refining your mask is essential for achieving flawless results. Utilize the Erase Brush tool to make precise corrections to your mask, ensuring the adjustments are perfectly applied. Enable Mask Overlay to clearly see where effects have been implemented, allowing you to spot and rectify any imperfections. By carefully fine-tuning the mask with these tools, you ensure a seamless blend of adjustments, resulting in a polished and professional image.
7: Preview and Final Touches
When blurring the background in Lightroom, it’s essential to compare and refine your edits against the original image. Leverage the Before & After view to assess your changes, ensuring they match your creative vision. If any areas need further adjustment, fine-tune the details to achieve a seamless blend. This comparison step allows you to measure the impact of your edits and make precise enhancements, resulting in a polished and professional final image.
8: Export Your Image
Once you’re happy with your blurred background and edits in Lightroom, you can export your image with the following steps: Go to the File menu and click Export. Select your destination folder, then customize your export settings. Adjust the image quality, resolution, and file format to ensure your final image matches your desired standards. You can also choose to share directly to social media platforms for quick posting. By fine-tuning these settings, you guarantee your image maintains its intended clarity and quality upon export.
Conclusion
Our team has explored all the key methods for blurring backgrounds in Lightroom and compiled an in-depth guide. Although Lightroom doesn’t offer a dedicated blurring tool like Photoshop, we outline how to use tools such as the Adjustment Brush, Clarity, and Sharpness sliders to achieve similar effects. This guide covers all relevant techniques and tools to help you blur backgrounds effectively in Lightroom, providing a professional-quality finish comparable to what can be achieved in Photoshop. Follow these steps to elevate your images with seamless background blurring.


![Lightroom HDR Presets Free Download Collection [2024] – Enhance Your Photos with Stunning High Dynamic 8 Lightroom HDR Presets Free Download Collection [2024] – Enhance Your Photos with Stunning High Dynamic](https://lrapk.pro/wp-content/uploads/2024/08/HDR-LR-PRESTS-768x419.webp)
![How to Smooth Skin in Lightroom: Step-by-Step Guide [2024] 9 How to Smooth Skin in Lightroom: Step-by-Step Guide [2024]](https://lrapk.pro/wp-content/uploads/2024/08/HOW-TO-SMOOTH-SKIN-USING-LR-APK-768x419.webp)